Showing posts with label Ginger Steele Workshop. Show all posts

Sunday, November 4, 2012

Still Makin' Pots - Goblets Today....

Thanks to all of you who have encouraged me to post process and work on my Insomnia Pottery blog.  It's been a long since my last post, but I continue to receive emails from potters who have found it useful.

Today I am working in the studio to fill a kiln for Holiday sales, and wrap up a few small special orders.  Although I don't make goblets as part of my production work for shows and galleries, I have some in my studio and visitors see them and want to purchase them.  At this time, only a few chalices are left - just the thing for toasting your Dungeons and Dragons compatriots!  

To me, a chalice is deeper and has a shorter stem in proportion to the overall height of the piece.  Buyers prefer more traditionally formed  goblets with tall steps and capacious bowls.  I think ceramic goblets sort of take away half the joy of wine drinking - seeing the beautiful color of the wine through a crystal vessel. Therefore, let's use them for mead or hard cider or best of all, a delicious hot toddy....

I like to make goblets in two parts and join them.  Both sections are thrown off the hump.  The clay I am using today is B-Mix, which has many fine properties.  However, it will be the last day for it in my studio for a while...  I am going back to Georgies' Cannon Beach 10.  

I'm starting off with about 5 pounds of clay - enough for about 6 bowls and fairly thick stems.  If you are not making small pieces - lids, knobs, small tea-bowls - off the hump, I really encourage you to learn to do so.  

The only complex part is separating the object from the hump in a tidy and level manner.  I struggled with this for years until Portland potter Ken Pincus kindly showed me how to do it the right way.  If I can find a friend to shoot a little video of me doing this tiny but essential trick, I will post it here in the next couple weeks.  

In the meantime, we'll stick to the goblet making....
Here's what we want to make.  It's crude!  But it is closely thrown and well centered.  The fun part - refining the stem and adding ornament will come during the trimming process.  With a toothy stoneware clay it is possible to do more preliminary forming of the stem, but the slickery B-Mix - pretty wet, also - wasn't willing.

It's important to keep downward pressure on the top of the stem as you bring it up so it isn't hollow.  If you have been throwing spots on the wheel, it's counter-intuitive.

There is also that big, thick base.  I'll trim that out later so them stem is light and balanced.
 Here's a shot of the top of them stem.  A small rice-bowl shape is thrown into the top of the stem.

I usually cut the top of the stem off level with my string tool so that this tiny cup - about 1-1/2" in diameter - is perfectly symmetrical and  dead level.  The separately thrown bowl will nestle into this cup.

Like a spout, there is movement during the firing that can "unwind" the form.  If all is not level, your goblet may come out of the firing with a tipsy appearance that it just not acceptable.

Drying the stem carefully under plastic is simply essential.  The thin little top must remain fresh and moist so it will join properly to the cup.

Here's a nice prospective bowl for one of the goblets.  I usually make 6 or 8 stems and the same number of bowls and match them for scale and form when I do the joining.

I will dry them separately, and trim the bottom of each on to match the stem-top cups, then use a serrated rib to scuff them up, and mate the trimmed stem to the cup right on the wheel head.

With the wheel in motion, it's easy to see if the stem and cup have been matched correctly, and repair any "wobbling" that is the sign of an out-of-plumb join.

I'll show all this later this week with photos from the join-up.

This taller piece is one of the most essential parts of the process - a chuck for trimming the base of the stems.

I'll detail the shaft of the stem right side up, with the heavy base stuck to the wheel head with coils of clay.

Then, I'll insert the stem into this chuck upside down so the base is supported.  The chuck was carefully thrown to be well centered, and was not cut off the bat.  It may live to become a vase, but might also just be recycled.

I find it hard to trim out the inside of the stems but they will crack if the wall section is not reduced carefully.  The crack would be up inside, typically an S-crack, and won't spoil the pot.  But why not do it right?


Here's a nice set of components for some goblets of various sizes.   I will probably trim and assemble them tomorrow night.


Sunday, August 21, 2011

Some Finished Knobs, and a Report on the New Salt Kiln

Yes, I finally did fire some of those knobs that I was blogging about back in January and February. I have been busy with other clay projects, daily work at my nursery business, and with learning to use my new salt kiln.

As you may recall from previous posts, my other kiln was deteriorating badly and needed a rebuild. With the help of co-workers from my nursery who have worked as masons in Mexico, I designed and cast the firebox, door, and arch of my new kiln. The body of the kiln was built of hard brick, with a soft brick shell for insulation. There is a much better metal superstructure than was built for my previous kiln, thanks to my brother Don who is a great welder.

First the good news - the new kiln is vastly more efficient and faster firing. It will reach cone 10 in about 14 hours, and I think it will do even better as I learn to fire it. But after just 4 firings, the cast refractory arch will have to be broken out and replaced with a hard brick arch. We just did not cast it as thick as it should have been, and the stainless steel reinforcing rod was consequently laid in too close to the interior surface. In the very first firing with ware in place - there had been a s-l-o-w curing fire as specified by the manufacturer - the arch cracked right down the center, and debris sifted onto the pots on the top shelf.

It's apparent from the image how the rebar has broken through the refractory material. It's going to be a nasty piece of work breaking out that arch. I have the original arch form, a big tile saw with a new blade, and those same guys who built the cast arch to help out.

You can see below how I set a shelf in the top of the kiln to collect the crud that same down from the cracked arch.... better than spoiled pots. I was hoping to get one more firing before Art In The Pearl, but it is not too be - it was just too badly cracked after the last firing.

I did get some very nice pots from firing 4, and am looking forward to using the kiln once the new arch is in place. Sigh.....


Monday, May 16, 2011

Building a New Teapot Form...

I've been thinking about handbuilding some new teapot forms for my summer shows. I like to apply patterns to my clay while it's flat and helpless... much easier than individually incising whole pots. I also think that teapot users like the funky, vaguely irregular bodies of handbuilt teapots. And of course, I really like to make them - the only real reason to do anything.

I had thrown forms related to this quite a few times and knew the scale and proportion that I wanted to achieve.

First, the clay has to be conditioned to be at the correct stage of dryness for cutting, decorating, and building. I undress the block of clay the night before, and leave it out for 4 or 5 hours, depending on whether or not I have a fire in the studio. In summer, it takes much less time. I just want to be sure that the clay is stiff enough that it won't collapse when I start assembling my forms. It's also much easier to do the stamping, rolling, and other surface decoration when the clay is a bit firm.


The next morning, I cut the block of clay into 3 or 4 slices so it can dry further, and will be easier to put through the slab roller. I use Slab Mat paper so I don't have to remove any canvas texture from my work. If you don't have a big block cutter like the one in the image, there are still lots of ways to cut nice slabs. If they are going to go through a slab roller eventually, it doesn't even really matter.


Using a drafting compass, I create conic patterns for my teapot. I am using stiff sheet PVC for my patterns - permanent and durable for studio use. On the pattern pieces, I will record the name of the piece, how many pieces there are, and assign a number to each piece. That really helps for storage and retrieval. I have more than 100 different patterns floating around my studio. I do try to keep each one in a labelled zip lock bag.


Here's a little mock-up of what the form will be. This step is an essential part of pattern making - it will allow me to assess the scale and proportion before whacking into the clay. As you can see from the picture, I have already reduced the diameter of the finished piece a bit to conform to my internal vision of the teapot.

Pattern making in the clay studio is a skill that can be learned. I got a major head start on the process through decades of sewing practice, where I made most of my own clothing patterns. Any craft that requires estimation and visualization will help with pottery making....


Here are the finished body patterns, ready to cut. The clay is about 1/2 centimeter, or 3/16" thick.

In my next post, I'll decorate these two components, and assemble the body of the teapot. There's a previous post that goes into considerable detail around building a spout with a mandrell, so I won't revisit that step.

Monday, March 7, 2011

Deteriorating Salt Kiln Requires Rebuilding....

I've fired my salt kiln 77 times in the past five years. I thought in the early years that I might get 100 firings, but the condition of the kiln is beginning to concern me and it's clear that it's time to rebuild the kiln. This has been a problem kiln since I first completed it - lots of desire for the salt process but not enough knowledge to build the kiln properly. Basically, there's just too much hard brick in the kiln. There were a lot of stalled firings in the first year, and then I kinda got it figured out and was able to get it to Cone 10 in about 14 hours. Those were the good days.... sigh. But then, I changed propane suppliers and they changed the regulator on the tank, and a frustrating period began with terrible long firings that barely reached temperature. There was a lot of BAD SCIENCE on my part - and my need for work for shows and galleries kept me from doing anything serious to remedy the situation.

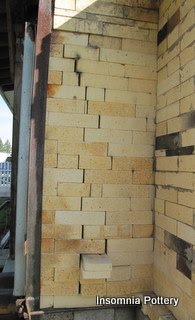
I might have gotten my 100 firings if it hadn't been for the many long stalls, hours and hours over 2000 F with temperature barely creeping up. You can see how damaged these bricks in the right rear of the kiln have become.
The skews in the arch are also deteriorating badly. I have been researching how much of the brick in my kiln can be reused - and I will be carefully evaluating each brick before I reuse it.

With new hard brick up around $7-8 each, I'd like to reuse as much as possible. I think that I will have to buy all new skews - they don't look good.


The kiln has steel angle iron edge pieces, but I am definitely going to use a wider stock in the new kiln. I am also going to offset the chimney so that a threaded rod can hold the back in compression at midpoint. You can see the rear burner pot - I will probably still have two opposed burners. I now have some really nice Buzzer burners that will be great for the new kiln.


You can see gaps between the bricks from movement of the kiln during firing. This is the left rear corner of the kiln, seen from behind. As you can see, there's some decent looking hardbrick on the outside of the kiln that should be reusable.


This is the middle of the left side of the kiln. In the first year or when I was really struggling to get temperature, I added a layer of kaowool insulation to each side under an aluminum panel. This location has had a lot of vapor escape, and it has really eaten up the angle iron reinforcement, and just plain dissolved the aluminum panel.


Here's another vapor leak on the other side. The kaowool is completely gone from that spot, it will be interesting to see what's under there.

I'm going to have some help with this project; a couple of guys who work with me are going to take the kiln down. I will sort and grind the brick... ooohhh! can't wait.

I'll post some more pix as I proceed, gotta have pots for Showcase!

Monday, February 7, 2011

Finishing up the Knobs...

Here are the blank knobs that were thrown at the wheel last week, with a little bit of incising added. I will probably make most of my knobs from low fire clay, especially those I need for my kitchen that will match my tile work there. I am sure that some of the knobs will find their way into the salt kiln, however.

These were thrown from my regular stoneware clay, but it really doesn't matter since all of these will perish in the press-mold making process.

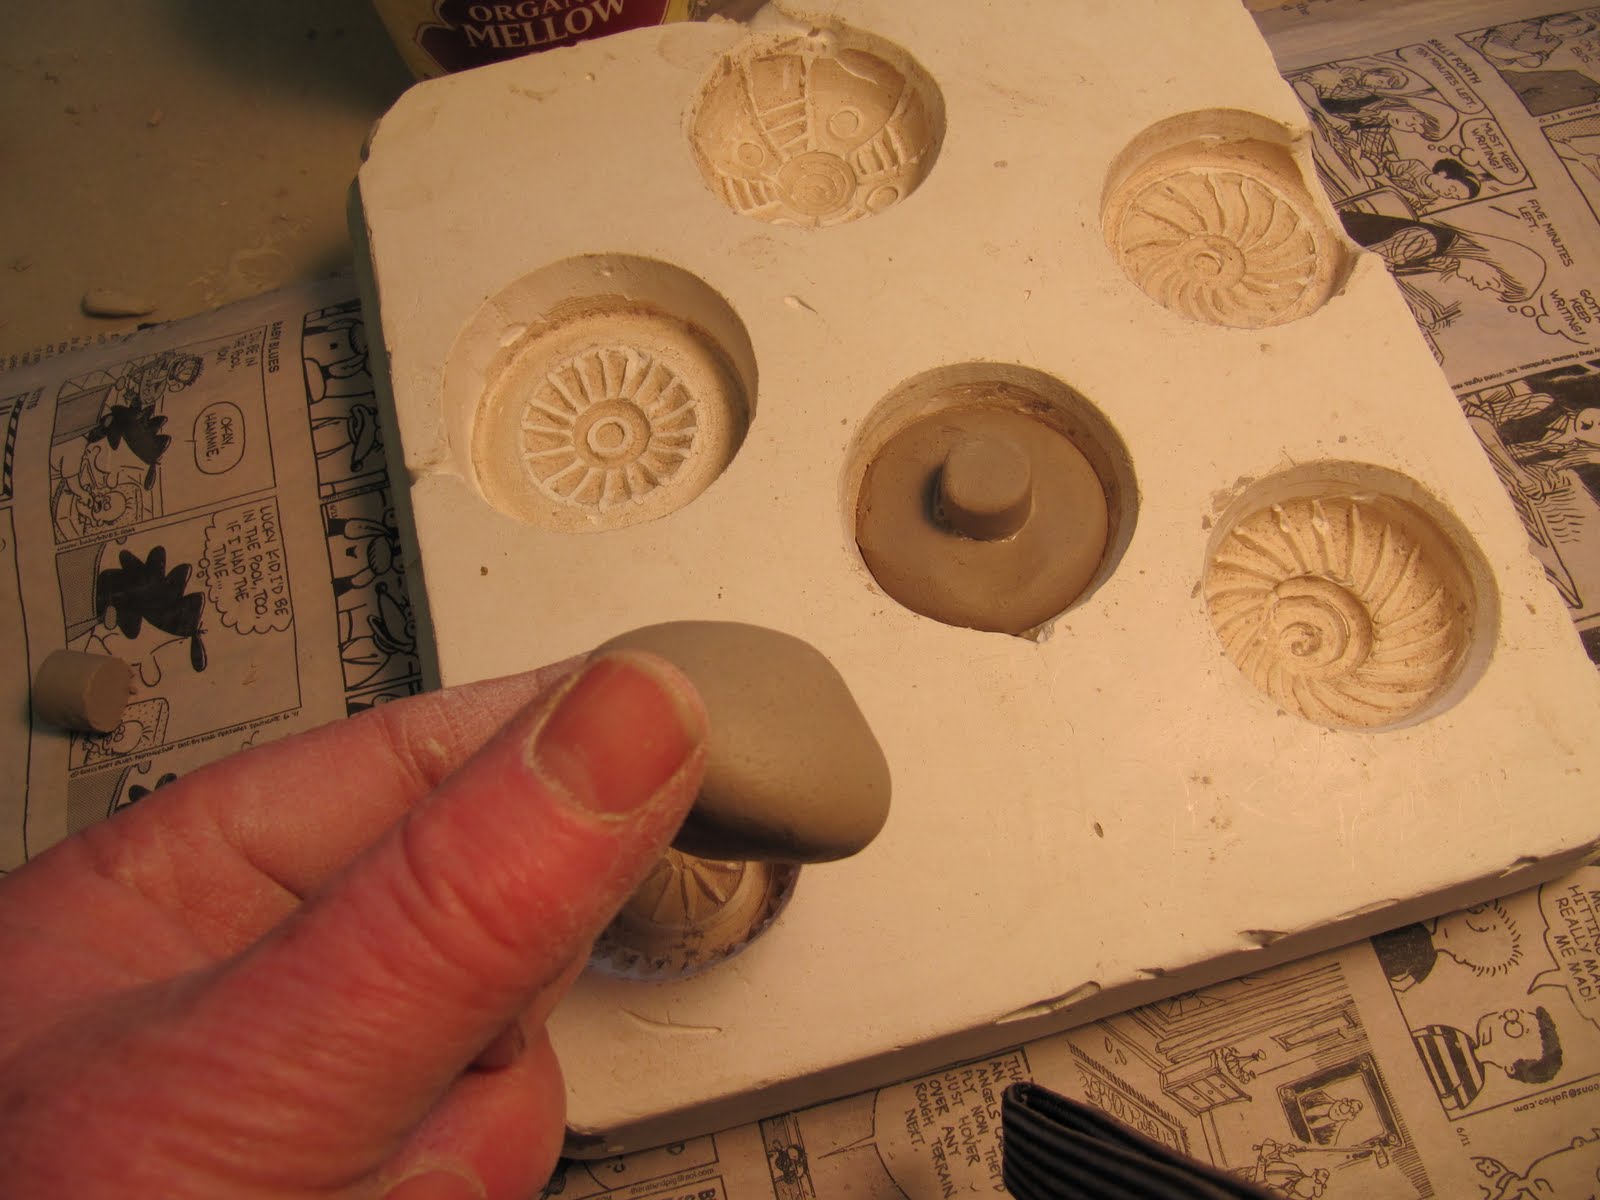
Here is the freshly cast press mold, with 8 cavities for different knobs. The clay originals removed from the mold are scrap, and need to be dumped - not reclaimed - since they are contaminated with plaster scrapings. I will let the press mold dry for a day, and then clean it by vacuuming, and also by discarding the first knobs that might have plaster scraps in them.

I have found that the easiest way to get a consistently sized knob is to extrude 1" coil, and then cut it to specific lengths to get the size ball I want. I have also extruded 1/2" coil to use for the knob shanks, and have carefully cut it to 1/2" lengths. It's firming up as I press the sized balls into the mold cavities. I am going to throw a little tool to press the ball into the mold and mark the center of the knob blank. My clay (Georgie's Cannon Beach 10) joins to itself really well, so I just score the shank bit with a serrated rib and center it on the back of the blank knob. After the shaft is joined to the knob, I wait about 5 minutes and they can be lifted out with the shaft. Cool!

Here's a finished knob made from the first press mold. Since I have been just pressing sized balls into the mold, the deeper cavities of the first mold haven't been a problem. I'll probably touch it up a little bit with plastic steel wool or sandpaper, depending on what the surfaces are like coming out of the molding process.

When the knob has dried a bit, I use a drill bit to make a hole in the center of the shank. I am going to experiment a bit with this - perhaps using one of those angled hole cutters that are used to make teapot holes. The 1/2" shank bit would have to be dried to use a tool like that - we'll see.....

I have used a 5/16" drill bit to make the holes... I think that should be big enough after shrinkage.

Here's the finished knob that Ted Juve gave me with his first instructions. You can see how the brass sleeve sits in the drilled hole. Ted says that it is very important that the knob be placed right side up after adhesive is placed in the hole, and the brass sleeve is inserted. That way, the sleeve will be flush with the bottom edge of the drilled hole, and will not vanish into the knob if the hole is deeper than the brass bit. I believe he suggested that the gluing be done on waxed paper - that will allow the paper to be peeled away leaving a tidy knob, and no knobs stuck to the worktable.

The brass gizmos and their screws come from Aftosa.

Tuesday, February 1, 2011

Knobs, Continued.....

Here's a nice little trim chuck for trimming the knobs I made the other day. It has a broad surface to support the knobs, and adhere to them while they are trimmed.

It will make a pleasing small vase after it does service as a chuck.

I threw it on a bat, but did not cut under it with a wire. It's essential that chucks be perfectly centered so that you can make the most regular knob possible. I like for the clay to still be wet enough to still be slightly sticky when the chuck is used. That way, the object being trimmed stays put on the chuck, but it also means that it is really easy to ding up the top of the chuck. But if it is that soft, it can easily be touched up with a moist sponge after the trimming. Anyway, it's just a chuck.

I like little trim tools for operating on knobs, lids, or other small pieces. There's not much to cut away, and I feel like I have more control while trimming.


Here are my knobs, ready for some additional decoration. I'll do that tonight, and then cast them in plaster tomorrow.

You can see that all of them have had their sides angled in slightly to make for easy casting. I don't think that will detract from their finished appearance.

Monday, January 31, 2011

Making Handmade Ceramic Knobs

As many of you know, I have been making tile for my kitchen as part of a home remodel. Most of the tile is complete, and some is installed. In my dining area, there are beautiful new oak cabinets that will have a tile counter top and back splash. I want to make ceramic knobs for these cabinets. I first saw handmade ceramic knobs at the home of my potter friend Ted Juve, in Enterprise, Oregon. Ted explained to me exactly how to make them, and gave me a small bag of the threaded brass inserts that complete the knobs.

I made my first knobs about a month ago, and cast them in plaster to make a press mold, so that I could make as many as I needed. The first knobs I made were too deep, and had to be hand cut after forming. I decided to make a new batch to carve and cast in plaster, and include this fun process in my blog.


I started out to throw some new knob blanks off the hump with my regular stoneware clay. I brought up a narrow column of clay, and formed a small knob with my fingers that was about 2 inches across. I added a little dimension to it, based on which of the first knobs I liked. The idea is that these new knobs will be just about the size that I want the finished knobs to be, accounting for shrinkage, so that I can just cut the knob to the finished size with a wire while it is in the press mold. I plan to shape the sides of the knob blanks when I trim the knobs in a tiny chuck later in the process. This will eliminate any undercut that might complicate the plaster process.

You can see that I am cutting the the small knob off the hump of clay with a thread tool. This is a small bamboo knife - about 5 inches long - with a hole drilled in the rounded end. Then, a piece of stout linen thread (buttonhole twist from the fabric store also works....) is threaded through the hole and tied. I like about 6" of thread.


I use the bamboo clay knife to place the knob blank on a board to dry a bit for trimming.

These knobs are finished by adding a 1/2 inch plug of clay at the back, and drilling a hole about about 1/2 inch deep into the extension to make a shaft to receive a threaded brass sleeve after firing. This permits the knob to be attached to the cabinet door just like you attach those boring (and expensive!) knobs from the hardware store.


When these knobs have dried a bit, I will trim them and carve a little extra pattern into them. After that, I will join a section of extruded coil to the back to form the shaft. I am going to glaze these with the green lowfire glaze that I have used for my tile project, but also plan to finish some in the salt kiln.

Hmmmm........ that will be fun.

Tuesday, September 21, 2010

Tile Making for My Home

For the next month or so, I will be creating tile for my own home. I'm going to be making a door surround for my front door - a 12"-14" border that will wrap both sides and the top of the door. I will also be making decorative tiles, back cove, and bullnose molding for a kitchen tile installation. I made most of the field tile about six years ago - about 80 square feet. A big new kitchen window and some new cabinets in my kitchen are a serious incentive to complete the project.

I have a slab roller, extruder, and glaze spray booth, all of which will be used to complete the tile. Because my pugmill is filled with the high-fire clay that I use for my production salt-fired pottery, I will not have the luxury of recycling the tile clay with the pugmill. I'll be working hard to keep waste clay to a minimum in my process.

Here's a picture of my slab roller and it's attached table, with work in progress. I like to roll my tile out on Slab Mat, a paper product made for the use of potters. I used to use canvas, but always wanted to take the canvas texture off the tile. The Slab Mat also reduces clay dust in the studio, which is good for me and my dog.

You can see lots of boards around the table... there are 12" x 24" drywall boards for separating and preliminary drying of the tile. There are also 24" x 24" boards which I use for moving tile around and for final drying.

I've been making tile for about 15 years, but continue to learn. My process is pretty much based around the equipment I own, and I know that there are many ways to make beautiful and functional tile. Years ago, I attended a tile making workshop presented by Frank Georgini, and I still consider his tile-making book to be one of the best available.

The first step in making tile, for me, is to get the bagged clay to the right stage of dryness. I check the bag of clay, and if there is any sheen of visible moisture, I open the bag and allow the clay to dry a bit right in the bag.

I will be using a low-fire talc body for my tile project; one with which I have had lots of experience. Because I have used Seattle Pottery Supply's LF-06 for a number of projects, I have several glazes that fit it very well. I have found the tile that I have made with it in the past to be durable. And, because winter temperatures are mild here in western Oregon, and since my new front door is tucked back under a covered porch and will not be exposed to the weather, I think that the low-fire tile will be fine for an outdoor installation. I will bisque and glaze fire both to Cone 04.

I use a large clay cutter to divide the block of clay into 3 even slices. Here, you can see two bags of clay cut and set on edge to dry. I like to work with clay that is as dry as possible. The drier your clay is when you roll and cut it, the fewer "dings" that there will be on your tile to remove later. The clay should be much, much drier than any clay that you would throw on the wheel.

It's a good idea to keep track of how you divide your bag of clay. When making tile, a potter should work toward forming slabs that have the smallest amount of waste possible. The stiff tile-making clay is simply no fun to wedge for reuse.

I cut my block into thirds, then stretch the stiffened blocks to exactly 15" long. When the 15" block is turned crosswise in the slab roller, and thinned to 1/4", I get 6 tiles that are 7.5" square with less than 1/2" of waste on each side. I worked all this out after making over 500 tiles of the same size for a mural installation at a local school. Right now, I am just making about 100 tiles for accent use. The main tiles for my kitchen job are 4" square.

In my next post, I will go into some of the techniques I use to make flat, regular, tiles. I know that sounds deadly dull, but it makes the tiles more beautiful and serviceable, and much easier to install.


Saturday, March 6, 2010

Making a Handbuilt Spout

First, a template is used to cut conditioned clay into a conic spout-shaped form. The clay is softer than what I use for most handbuilding - this will permit the spout to be curved without any cracking of the clay. The clay should be just a tiny bit over 1/8" thick. When a wheel-thrown spout is made, the wall section naturally tapers from the bottom to the top. To replicate this thinning of the spout wall, I use a dowel to roll a small taper into the entire spout, thinning the top 1/3 of the spout just a bit. After this secondary thinning, I again trim the spout blank with the template.

This will help to make a more refined pouring tip possible later in the process. The template has been made by trial and error - rolling my wooden mandrel on the sheet PVC I use for patterns - and then using the side of the mandrel as a straightedge. I do make the attachment end of the spout a bit wider than the natural size of the mandrel. The template is about 10"long. The best mandrel I have was made of oak by a potter in Eugene, Dan Schmidt. I believe he went away to ceramics grad school.... correct me here, Eugene blog-followers. The Big Ceramic Store on line sells a mandrel but the proportion isn't right. I have had some made by a local woodturner that I use for my workshops.

Using the brayer, I thin and bevel both long sides of the spout blank. This allows a neat, thin join to be made. It's good to thin and bevel in several passes, working in opposite directions and making an effort not to distort the spout blank. I like to work on a thick pad of newspaper, since I don't want any canvas texture imparted to the pieces.


I also thin the tip of the spout a bit more with the brayer.


Now, I score and moisten the top edge of the spout blank on the paper in front of me, taking care to not cut or damage the thinned edge with my serrated rib. When the top edge is prepared, I turn the spout blank over on its' long axis so the other long edge is at the top. I score and moisten that edge as well, so that and inside and an outside edge is prepared.


In this image you can see each edge prepared for joining.


I lay the mandrel onto the prepared spout and begin to shape the spout to the mandrel. It must be done carefully to prevent marking the spout blank with your fingers.


With one side conformed to the mandrel, the spout blank can now be wrapped around the mandrel, taking care to match the pouring end nicely. This takes a little practice. It's okay if your mandrel doesn't extend all the way to the tip, you can use your fingers to press the tip into a neat join. Do not cut the tip at this point or try to shape it. That can be done much more easily quite a bit later, even after the spout is placed on the teapot.


Here's a pic of a stage in spout making where proper alignment of top and bottom edges can be seen. I don't apply any lengthwise pressure to the joint - I just sort of press with fingertips to mate the two edges.


Here's the spout with sides all joined up. The spout can be very gently twisted to straighten the line of join. The line can be "erased" with a finger tip, but a bit dryer stage. I have always preferred to leave the line be, or even make it part of my overall design. Textured clay can also be used for spout making. In that instance, trying to remove the join line will obliterate the impressed pattern.


In the case of this spout, I use my brass dot-roller to decorate the join.

When you are decorating your spout, or looking at the join line, it's important that the joined edge end up on the upper surface of the spout. This is because the bottom of the spout will extend out further than the upper edge, and needs to be stronger and have the internal integrity of "whole clay." I sometimes even moisten and "pull" the bottom edge of the spout a tiny bit to create better pouring properties, and a traditional look.

Now, holding the spout in both hands, carefully impart a graceful curve to the finished spout. What you see in the image is about right for the teapot bodies I will be making. You will have to experiment with your own forms. I usually make spouts the day before I make teapots, and allow them stiffen slowly. I like to put them in a plastic shoe box, cushioned in dry cleaner plastic, with the lid on tight. It is possible to join a pretty soft slab to a teapot body, but I can get a neater look with a spout that has "rested" a while.

When the teapot body is ready, the spout will be cut with a single long stroke and joined to the body. That will be next.

Just a note about the mandrel and it's use.... most potters actually pull a hollow spout over the mandrel by twisting a cone of solid clay onto the form and pulling a hollow spout down the tapered tool. I tried about three times to do this with appalling results, gave up, and started handbuilding spouts with the mandrel as an aid. At that point in my clay career, I couldn't pull a handle either, so maybe I should try again.

I have seen Steven Hill pull a spout on a pool cue sprayed with WD-40. Pretty impressive!

Tuesday, March 2, 2010

State of the Reliquary and Notes from the Workshop

Here are some cups and teapots made by potters at the workshop in my studio this past Saturday. White earthenware clay - LF06 from Seattle Pottery Supply - was used to build these pieces. Participants worked with conditioned clay slab, stamps, rollers, and texture mats to form and decorate their pieces, and all pulled handles on their teapots after practicing handles on their cups. We all decided to call the process "handle smoothing" instead of "handle pulling".

I'll be posting the whole teapot making sequence on the blog in the next week or so. In the meantime, here's the low-fire glaze recipe that we talked about during the workshop and saw on pieces in the studio. This is an extremely well behaved, paintable Gerstley Borate glaze that comes from Gail Kendall. It should be thick and goopy - about the consistency of yogurt, and is easy to paint on pieces. I like to use one of those cheapie disposable brushes from Home Depot, but any wide flat brush with coarse bristles is fine.

You can paint this glaze inside a cup fairly easily, but it is a problem to get it inside teapots or tall pieces, or very small pieces. I use Georgie's lowfire base glaze for pouring inside pieces. I am not sure if this glaze is still available, but every pottery supply house offers a dry lowfire clear. These glazes are often hard to dip on smoothly, and sometimes have unpleasant opaque areas where the glaze is too thick. The Georgie's base glaze is very nice sprayed on the outside of pieces, but I could never get a good surface by dipping or pouring. But it makes a great liner glaze, and is completely compatible with Kendall glaze. Over or under, the two glazes melt together smoothly. Here's the recipe:

Kendall Paintable 04 Glaze

55% Gerstley Borate
30% EPK
15% Silica

Rich Green - 8% Copper Carbonate
Cobalt Blue - 2.5% Cobalt Oxide
Inky Blue - 6% Copper Carbonate + 1.5% Cobalt Oxide
Rich Yellow - 6% Rutile
Cream - 3% Rutile
Warm Clear - 1.5% Rutile
Ochre - 7% Umber
Medium Blue - 2.5% Cobalt Carbonate

Mason Stains - 4% typical, more required for all pink, purple, red

The "Cream - 3% Rutile" variant is what was used on the pieces seen in my studio.

This glaze should be thick! If you try to thin it enough to pour, it will not yield a satisfactory surface. I paint three thin, even coats on each piece, taking special care under handles and around details. It will crawl if it is too thick. Let each coat dry before applying the next.

The slab for the reliquary is bisque fired and ready for the mat to be made. I will be doing that later today, and will also be testing three different seal/release products.

It was a very close fit going into the kiln.... but I wanted the largest slab possible. I have tried standing the slabs on edge for firing, but they bowed in firing. I was still able to make useful mats from those slabs, however.