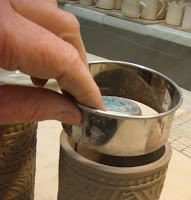
Before I had the cutters, I had a small collection of round things that I used as templates; mostly jar lids and lids from plastic containers. You can easily size slab for a specific template diameter by measuring around the circular object with a tape measure. The measurement is usually about 1/4" longer than the slab needs to be. A little patience with the trial and error process will yield a nice fit, just be sure to jot down what slab size is required for a particular circular template.


Now, moisten and score both the bottom of the cylinder and edges of the circular bottom with a serrated rib. It's good to have a close fit, but if the bottom is a bit large be sure that the cylinder is centered on it. After the bottom begins to adhere, flip the cylinder, which I guess is now a cup, over. You can gently move the cup around as needed to center, or adjust the edges. It will slide on the film of water for a few minutes after it is set on the bottom.
I usually attach the bottom with the cup upside down. You can see the neatly fitting bottom ready to become part of the cup below. Just a little smoothing with the finger, and perhaps a careful sponging with a little piece of sponge is all that is needed to finish the bottom.


Just a swipe with the finger
is enough to seal the seam.

A tool can be used to firm the
vertical join.

Now, the finished cup can be set aside to stiffen in preparation for pulling a handle. If the top rim is firm and level, the cup can be turned upside down. If it is soft, cover the cup with plastic so the mug can firm up slowly. I often pull handles on hand-built mugs the day after I form them.
great post Ginger! I love watching the process from the start - between the photos and the step by step - I'm hooked.
ReplyDelete